
Assignments Transfer
School and district administrators have access to an Assignment Transfer Tool, which gives them the ability to transfer assignments to the teacher's preferred class for students that are rostered to more than one class.

|
To find out more about how to create an assignment on behalf of a teacher, please visit Access, Create, and Edit Teacher Assignments. |
If you're looking for a particular section about Assignment Transfer Tool, use the links below to quickly move to that section:
Access the Assignment Transfer Tool
Helpful Information about the Assignment Transfer Tool
Access the Assignments Transfer Tool
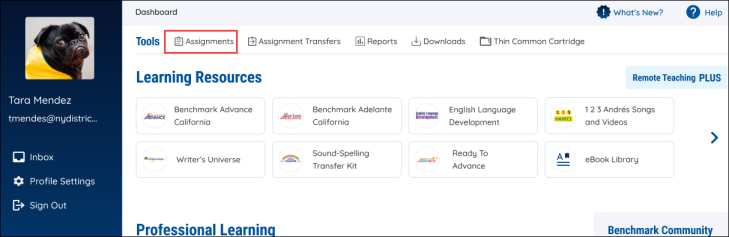
Administrators can access the Assignment Transfer Tool through the Assignments link on their Dashboard.
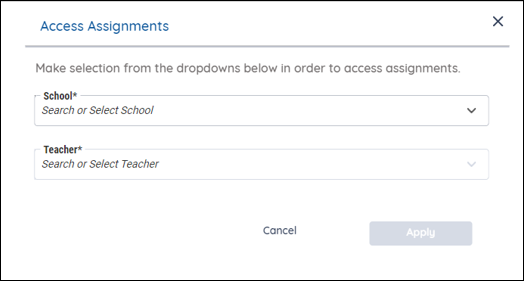
Administrators then need to make selections within the Access Assignments modal.
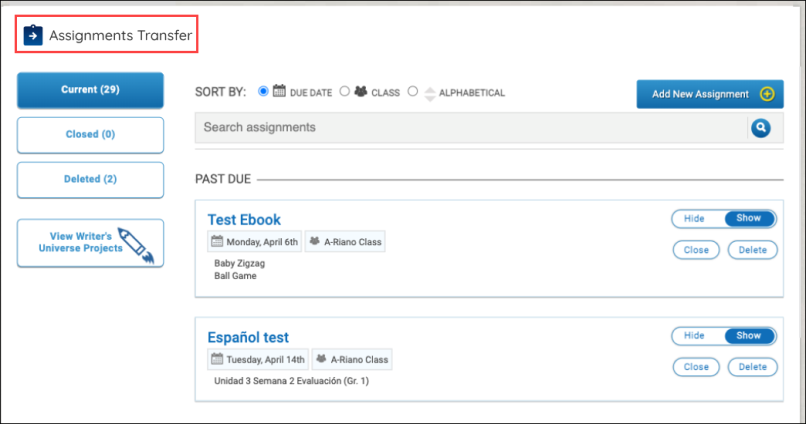
Once selections are made within the Access Assignments modal, administrators will see a link in the top left corner of the page, titled Assignments Transfer. This link will bring administrators to the Assignment Transfer Tool.
Once administrators navigate to Assignments Transfer page, a Back to Assignments link is available to seamlessly navigate back to the Assignment List page.
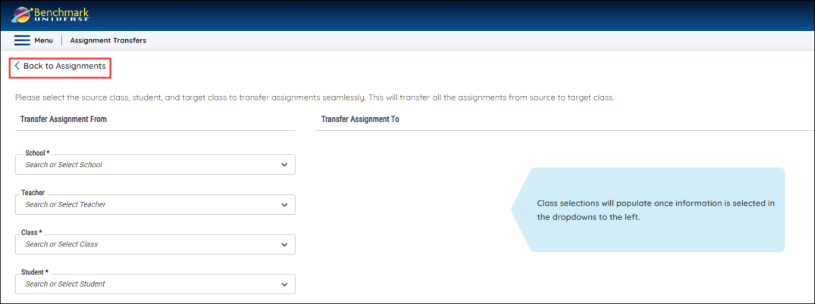
The Assignments Transfer page has two Sections:
1. Transfer Assignment From
2. Transfer Assignment To
Assignment Transfer Process
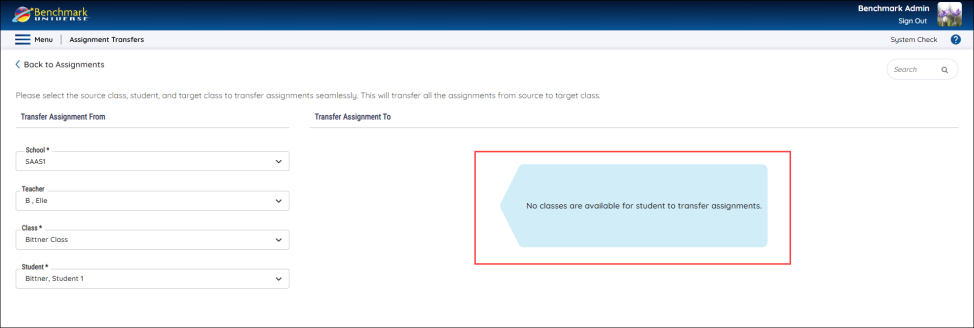
Administrators need to select the source class, student, and target class to transfer assignments seamlessly. This will transfer all the assignments from the source class to the target class. See the steps below to initiate a transfer:
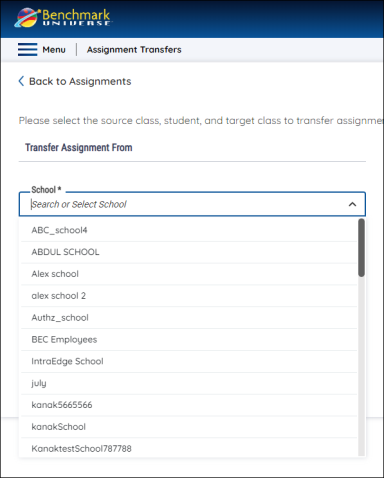
1. Select a school from the School dropdown. Only one school can be selected at a time. Selecting a school is mandatory.
|
|
For users that are rostered to one school only, the name of that school will be automatically displayed in the School dropdown. |
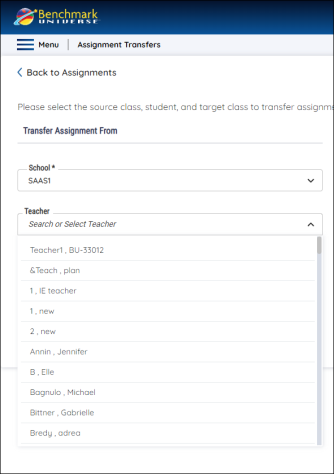
2. Optional: Select a teacher that is associated with the selected school from the Teacher Dropdown. Only one teacher can be selected at a time.
|
|
Users will not be able to access the Teacher dropdown until a school is selected, for users with multiple school associations. |
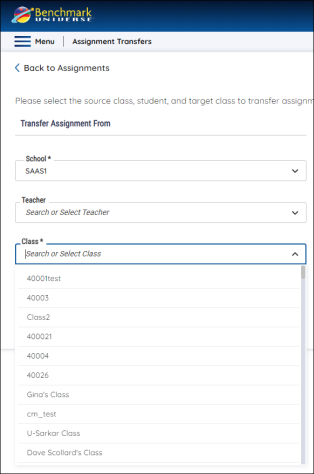
3. Select a class from the Class Dropdown corresponding to the selected school. Only one class can be selected at a time. Selecting a class is mandatory.
|
|
If users select a teacher, then a list of classes that are rostered to the selected teacher will populate in the class dropdown for selection. |
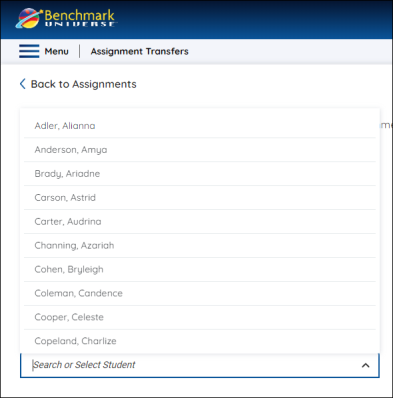
4. Select a student associated with the selected class from the Student Dropdown. Only one student can be selected at a time. Selecting a student is mandatory.
|
|
You can type in the text field dropdowns to quickly find a school, teacher, class, or student from their respective dropdown lists. |
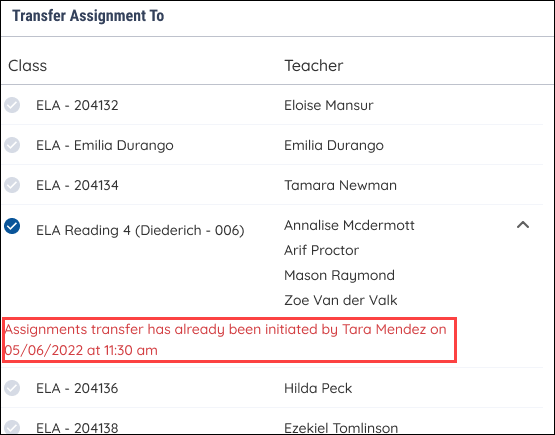
5. Once the required fields are selected within the Transfer Assignments From section, the Transfer Assignments To section will populate with a list of rostered class(es) associated with the selected student. For each of these classes, the class name will display along with the teacher’s name(s).
6. Select a Target Class from the available Class list by selecting the radio button available next to it. Only one class can be selected at a time. Users can click on the expansion arrow next to the teacher’s name to see all of the teachers that are associated with a class.
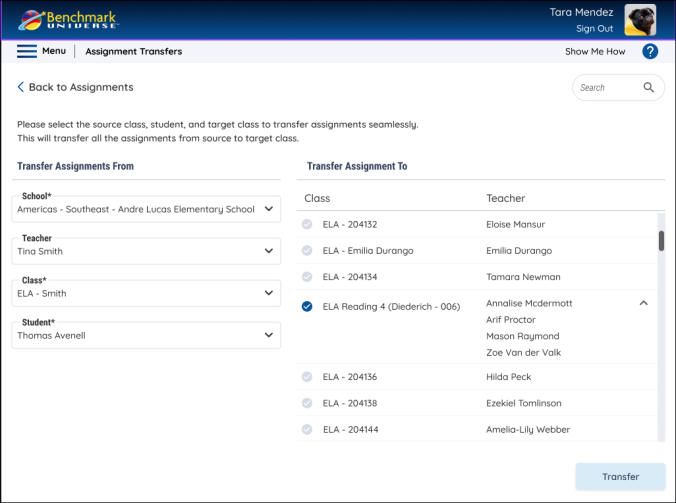
7. Once the Transfer button is selected on the Assignments Transfer page, a confirmation modal will appear. This modal provides information about the transfer requested. Users must select “”Yes” for the transfer process to begin.
Users can select the X or Cancel button to go back to the Assignments Transfer page and edit their selections as needed.

8. After selecting “Yes,” users will be brought back to the Assignments Transfer page, and a banner will appear to let users know that the transfer is processing.
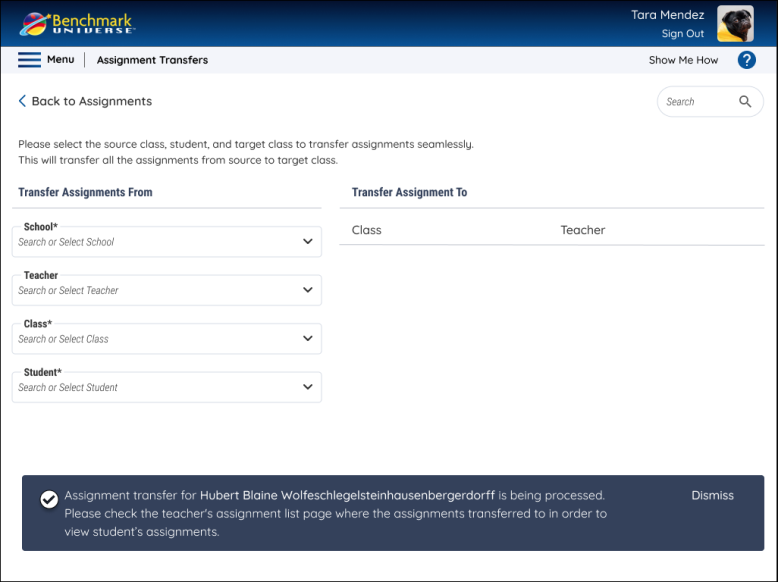
9. Once the transfer has processed, the target teacher will receive a notification within the assignment blocks of the assignments that were transferred. An assignment block will be generated for each assignment transferred. This notification will let the teacher know who the assignments were transferred by, along with the date and time of the transfer.
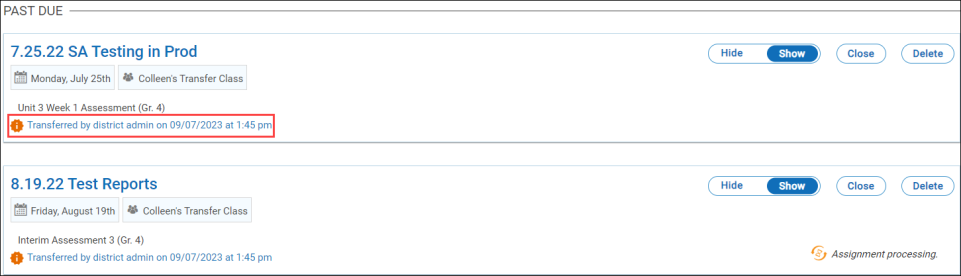
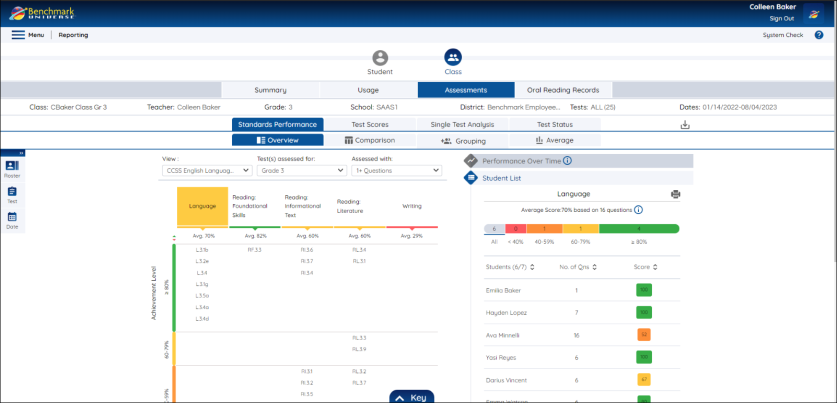
Teachers will also see transferred assignments within the Reports application.
Helpful Information about the Assignment Transfer Tool
1. If a student is associated with only one class, Transfer Assignments To section will read "No classes are available for student to transfer assignments."
2. If an administrator attempts to initiate a transfer that is already processing, they will receive an error message on the Assignments Transfer page. This message lets the user know the date and time that the transfer was initiated, as well as who initiated the transfer.
3. The Search Field is to search within the Transfer Assignment To section. Classes and teachers within this section can be searched using a partial entry or a full name. For example, if users are searching for Class LangArtsA, using the search field, they can search for this class by either the full name or partial name, such as ‘Lang,’ ‘Arts,’ etc.
- If there is an invalid entry in the search field, users will receive a 'No Results Found' message in the table area of the Transfer Assignments To section. Selecting the ‘X’ within the Search Field will delete the entry.